Updos for Long Hair: A formal occasion demands a stunning hairstyle that complements your outfit and makes you stand out from the crowd. Whether you have straight, wavy, curly, or coily hair, there’s an elegant updo that’s perfect for your long locks. We’ve gathered a list of the top 40 best updos for long hair, perfect for any formal occasion. Get ready to turn heads and make a lasting impression!
1. French Twist – A timeless classic, the French Twist adds poise and sophistication to your look. It works well with straight, wavy, or curly hair.
2. Braided Chignon – A chic update to the traditional chignon, adding a braid creates visual interest and makes this style pop.
3. Fishtail Crown – Transform your long hair into a royal accessory with a beautiful fishtail braid wrapped around your head like a crown.
4. Ballerina Bun – Sleek and simple, the ballerina bun is a staple choice for formal events, suitable for all hair textures.
5. Loose, Romantic Waves – Ideal for wavy hair, gather your locks into a low, loose updo for a soft, romantic look that’s effortlessly elegant.
6. The Gibson Tuck – This beautiful updo works on all hair textures and conveys a vintage feel; perfect for a formal, vintage-inspired event.
7. Grecian Waterfall Braid – A cascading waterfall braid paired with soft tendrils is perfect for a romantic, Grecian-inspired look.
8. Twisted Low Bun – This sleek and twisted low bun is equal parts modern and classic, making for a stunning formal hairstyle.
9. Double Dutch Braids – Braid your hair into two Dutch braids and combine them at the nape of your neck for an unforgettable look.
10. Side-Swept Curls – Showcase your gorgeous curls by pinning them to one side for a chic and glamorous appearance.
11. The Bow Updo – Channel your inner fashionista by transforming your long lock into a bow-shaped updo. Unique and eye-catching!
12. Fauxhawk Braid – Make a bold statement with a braided fauxhawk, perfect for the modern, edgy woman attending a formal event.
13. Braided Donut Bun – Beat the heat with a braided donut bun. Sophistication meets style in this classy updo.
14. French Braid Updo – A French braid that leads into an updo is an elegant hairstyle with a twist that works for all hair textures.
15. Sleek Ponytail – For a minimalist yet striking look, opt for a sleek and long ponytail, perfect for all hair types.
16. Half-Up, Half-Down Twist – Combine the best of both worlds with a half-up, half-down twisted hairstyle that leaves your hair cascading beautifully.
17. Vintage Victory Rolls – Embrace old-school glam with victory rolls, perfect for pin-up-inspired events or to kick it up a notch.
18. Double Crown Braid – A double crown braid encircles the head, creating a regal and ethereal look.
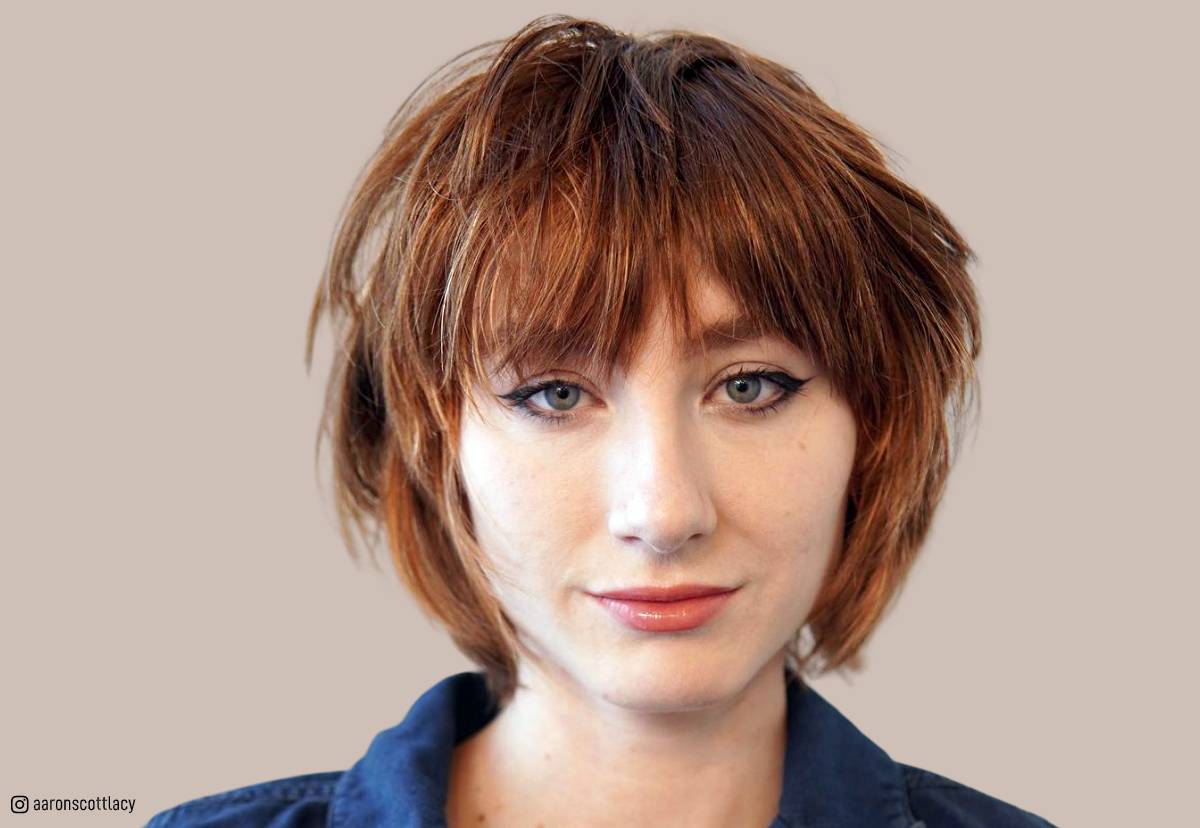
19. Textured Updo with Fringe – Enhance the glam for coily-haired beauties by creating a textured updo and leaving a fringe of curls framing the face.
20. Infinity Braid – An intricate
Trendy Updos for Long Hair
Long hair can be a blessing and a curse, especially when you’re in a rush to find a gorgeous hairstyle for a night out. Luckily, there are plenty of trendy updos that will not only look fabulous but will also keep your long locks in place. From braided buns to elegant chignons, there is no shortage of updos for long hair that are bound to make you the envy of every room you enter.
The key to achieving the perfect updo for your long hair is to experiment with different styles until you find the one that complements your face shape and accentuates your features. So, whether you’re heading to a gala event or just looking for a special occasion hairstyle, try out some trendy updos to make your long hair stand out in a crowd.
1. Rose-Shaped Braided Bun
A “Rose-Shaped Braided Bun” is a beautiful and intricate hairstyle that combines braids and buns to create a flower-like appearance. This style works best on medium to long hair. Here’s a step-by-step guide to create a rose-shaped braided bun:

- Prepare your hair: Make sure your hair is clean and tangle-free. You can apply some hair mousse or a light styling cream for better grip and control.
- Create a ponytail: Gather your hair into a high ponytail and secure it with a hair tie. If you have very long hair, you may want to do a slightly lower ponytail to make the braiding and wrapping process easier.
- Divide the ponytail: Divide the ponytail into two equal sections.
- Braid each section: Braid each section separately into a regular three-strand braid. You can also try a fishtail braid or a rope braid for a different look. Make sure to braid all the way to the ends and secure with a small elastic.
- Loosen the braids: Gently tug at the sides of each braid to loosen them slightly. This will create more volume and make the rose shape look fuller.
- Create the rose shape: Take one of the braids and begin wrapping it around the base of the ponytail, laying it flat against your head. Secure the first loop with bobby pins as you go. Make sure to hide the end of the braid by tucking it under the bun and securing it with a bobby pin.
- Wrap the second braid: Take the second braid and wrap it around the first, continuing the rose shape. Again, secure the braid with bobby pins as you go, and tuck the end underneath the bun.
- Adjust and secure: Once both braids are wrapped around the base, take a look at the overall shape of the rose. Make any necessary adjustments by gently tugging at the braids or using additional bobby pins to secure loose sections.
- Final touches: Spray your rose-shaped braided bun with a light hold hairspray to keep it in place. You can also add decorative hair accessories, like small flowers or jeweled pins, to enhance the rose effect.
And there you have it! A beautiful rose-shaped braided bun that’s perfect for special occasions or just a fun, everyday look.
2. Adorable Twisted Low Buns
“Adorable Twisted Low Buns” is a cute and easy hairstyle that works well for casual outings, special occasions, or even as an everyday look. Here’s a step-by-step guide to create adorable twisted low buns:

- Prepare your hair: Start with clean, tangle-free hair. You can apply a light styling cream or leave-in conditioner to help with manageability and smoothness.
- Part your hair: Create a middle or side part, depending on your preference.
- Divide your hair into sections: Divide your hair into two equal sections, one on each side of your head.
- Create low ponytails: Gather each section into a low ponytail near the nape of your neck, securing each with a hair tie.
- Twist the ponytails: Take one of the ponytails and twist it until it starts to coil on itself. The twist should be relatively tight but not so tight that it becomes uncomfortable.
- Wrap the twisted ponytail: Wrap the twisted ponytail around its base, creating a small bun. Tuck the end of the twist under the bun and secure it in place with bobby pins. Make sure to insert the pins through the bun and into the hair tie for a strong hold.
- Repeat on the other side: Repeat steps 5 and 6 with the other ponytail, making sure both buns are symmetrical and sit at the same level on your head.
- Adjust and secure: Gently pull at the edges of the buns to make them look slightly looser and more relaxed. Use additional bobby pins to secure any loose hair or sections that need extra support.
- Add finishing touches: Apply a light-hold hairspray to set the style in place. If desired, accessorize with decorative hairpins, clips, or flowers to personalize the look.
Now you have adorable twisted low buns that are both stylish and easy to create!
3. Messy Twisted Chignon Updo
A “Messy Twisted Chignon Updo” is an effortlessly chic hairstyle that’s perfect for casual outings, special occasions, or even as a polished everyday look. Here’s a step-by-step guide to create a messy twisted chignon updo:

- Prepare your hair: Start with clean, dry hair that’s free of tangles. Apply a texturizing spray or dry shampoo to add some grip and texture to your hair, making it easier to work with.
- Create a low ponytail: Gather your hair into a low, loose ponytail at the nape of your neck, and secure it with a hair tie. Leave out a few face-framing pieces for a softer, more romantic look.
- Divide the ponytail: Divide the ponytail into two equal sections.
- Twist the sections: Twist each section separately, in the same direction (clockwise or counterclockwise).
- Create the chignon: Take one of the twisted sections and wrap it around the base of the ponytail, laying it flat against your head. Secure the twist with bobby pins as you go, making sure to insert the pins through the twist and into the hair tie for a strong hold. Tuck the end of the twist under the chignon and pin it in place.
- Wrap the second twist: Take the other twisted section and wrap it around the first twist, following the same direction as the first wrap. Continue to secure the twist with bobby pins as you go, and tuck the end underneath the chignon, pinning it in place.
- Loosen the chignon: Gently tug at the edges of the chignon to create a slightly messier, more relaxed look. You can also pull out a few strands of hair around your face for a softer, more romantic appearance.
- Secure and set: Double-check your chignon and use additional bobby pins to secure any loose sections or strands. Apply a light-hold hairspray to set the style in place.
- Add finishing touches: If desired, add decorative hairpins, clips, or flowers to personalize the look and add a touch of elegance.
Now you have a beautiful and stylish messy twisted chignon updo that’s perfect for any occasion!
4. Volumized Casual Messy Bun
A “Volumized Casual Messy Bun” is a stylish and effortless hairstyle perfect for everyday wear or casual outings. Here’s a step-by-step guide to create a volumized casual messy bun:

- Prepare your hair: Start with clean, dry hair that’s free of tangles. Apply a texturizing spray or dry shampoo to add some grip and texture to your hair, making it easier to work with.
- Create volume: To create volume at the crown of your head, gently tease the top section of your hair using a teasing brush or comb. Hold a section of hair up, and backcomb it toward your scalp. Repeat this process with a few more sections to create the desired amount of volume.
- Smooth the top layer: Using a boar bristle brush or your fingers, gently smooth the top layer of your hair without flattening the teased volume.
- Gather your hair into a ponytail: Gather your hair into a high or mid-height ponytail, depending on your preference. Secure the ponytail with a hair tie, ensuring you maintain the volume at the crown.
- Create a loose bun: Hold the base of the ponytail with one hand and use the other to twist the length of the ponytail. Wrap the twisted ponytail around the base to form a loose bun. Keep the bun relaxed and slightly messy for an effortless look.
- Secure the bun: Use bobby pins to secure the bun in place, inserting them through the bun and into the hair tie for a strong hold. Make sure to pin any loose strands or sections that need extra support.
- Loosen and adjust: Gently pull at the edges of the bun and surrounding hair to create a slightly messier, more relaxed look. You can also pull out a few strands of hair around your face for a softer, more casual appearance.
- Set the style: Apply a light-hold hairspray to set the hairstyle in place and keep it secure throughout the day.
- Add finishing touches (optional): If desired, add a decorative hair accessory such as a headband, scarf, or hairpin to personalize the look and add a touch of style.
Now you have a volumized casual messy bun that’s perfect for everyday wear or a relaxed day out!
5. Pastel Blue Braid and Low Bun
A “Pastel Blue Braid and Low Bun” hairstyle is a stunning combination of color and style, perfect for special occasions or when you want to make a statement. Here’s a step-by-step guide to create a pastel blue braid and low bun:

- Color your hair: To achieve a pastel blue shade, you’ll need to have your hair professionally colored, or you can use a temporary hair color spray, chalk, or semi-permanent dye. Follow the instructions on the packaging for the specific product you choose.
Note: If you have dark hair, you may need to bleach your hair first to achieve a pastel blue shade. Consult a professional hairstylist to help you with this process to minimize damage to your hair.
- Prepare your hair: Start with clean, dry, and tangle-free hair. Apply a heat protectant spray and a light styling cream to help with manageability and protect your hair from heat styling.
- Curl your hair: Using a curling iron or wand, create loose waves throughout your hair. This will add texture and volume, making it easier to style.
- Part your hair: Create a side part or middle part, depending on your preference.
- Create a side braid: Take a section of hair from the heavier side of your part, near your hairline. Divide this section into three equal parts and create a French braid, incorporating more hair as you work your way down. Once you reach the back of your head, continue braiding in a regular three-strand braid till you reach the end. Secure the braid with a small hair tie.
- Gather your hair into a low ponytail: Gently pull all your hair, including the braid, to the nape of your neck and secure it with a hair tie. Make sure not to flatten the braid or the waves.
- Create a low bun: Twist the ponytail and wrap it around the base to form a loose, low bun. Secure the bun with bobby pins, making sure to insert the pins through the bun and into the hair tie for a strong hold.
- Loosen and adjust: Gently pull at the edges of the bun and surrounding hair to create a slightly messier, more relaxed look. You can also loosen the braid slightly by gently tugging at the sides.
- Set the style: Apply a light-hold hairspray to set the hairstyle in place and keep it secure throughout the day.
- Add finishing touches (optional): If desired, add a decorative hair accessory such as a jeweled hairpin or small flowers to personalize the look and add a touch of elegance.
Now you have a stunning pastel blue braid and low bun hairstyle that’s perfect for special occasions or to make a bold statement!
6. Asymmetrical French Twist
An “Asymmetrical French Twist” is a stylish and elegant hairstyle with a modern twist on the classic French twist. It’s perfect for special occasions, formal events, or when you want a sophisticated look. Here’s a step-by-step guide to create an asymmetrical French twist:

- Prepare your hair: Start with clean, dry hair that’s free of tangles. Apply a heat protectant spray and a light styling cream or mousse to help with manageability and provide a better grip for the twist.
- Add volume and texture: Use a curling iron or wand to create loose waves throughout your hair for added texture and volume. Alternatively, you can also use a texturizing spray or dry shampoo for added grip.
- Create a deep side part: Choose a side for the part based on your preference or how your hair naturally falls. A deep side part will create a more dramatic asymmetrical effect.
- Gather your hair: Gently comb your hair back on the side with less hair, and gather all your hair to the opposite side, creating an asymmetrical look.
- Start the twist: Hold the gathered hair with one hand at the nape of your neck, and with the other hand, begin twisting your hair upwards and inwards toward the center of your head. Ensure the twist is tight enough to hold but not so tight that it becomes uncomfortable.
- Tuck and secure: As you twist, fold the hair under itself, tucking the ends into the twist. Continue twisting until you reach the top of your head, ensuring that the twist remains asymmetrical and off-center.
- Pin the twist: Use bobby pins or hairpins to secure the twist in place. Start at the bottom of the twist and work your way up, inserting pins horizontally into the twist and anchoring them in the hair underneath.
- Adjust and finalize: Once the twist is secured, gently loosen the top and sides of your hair to create a softer, more relaxed look. You can also pull out a few face-framing strands for a romantic touch.
- Set the style: Apply a strong-hold hairspray to set the hairstyle in place and keep it secure throughout the day or night.
- Add finishing touches (optional): If desired, add a decorative hair accessory such as a jeweled hairpin, comb, or small flowers to enhance the elegance of the look.
Now you have a beautiful and sophisticated asymmetrical French twist hairstyle that’s perfect for special occasions and formal events!
7. Easy Twist and Flip Bun
An “Easy Twist and Flip Bun” is a simple, elegant hairstyle that’s perfect for work, casual outings, or even special occasions when you’re short on time. Here’s a step-by-step guide to create an easy twist and flip bun:

- Prepare your hair: Start with clean, dry hair that’s free of tangles. Apply a light styling cream or leave-in conditioner to help with manageability and smoothness.
- Gather your hair: Gather your hair into a low ponytail at the nape of your neck, but do not secure it with a hair tie yet.
- Create a small gap: Using your fingers, create a small gap just above the base of the ponytail, between your head and the hair. The gap should be wide enough to fit the ponytail through it later.
- Twist the ponytail: Hold the base of the ponytail with one hand and use the other hand to twist the ponytail tightly.
- Flip the twisted ponytail: Flip the twisted ponytail up and through the gap you created in step 3, pulling it all the way through. This will create a twisted loop at the base.
- Tuck and secure the ends: Tuck the remaining loose ends of the twisted ponytail back into the loop you created and secure them with bobby pins.
- Adjust the bun: Gently pull at the edges of the bun to make it look slightly looser and more relaxed. Use additional bobby pins to secure any loose hair or sections that need extra support.
- Set the style: Apply a light-hold hairspray to set the hairstyle in place and keep it secure throughout the day.
- Add finishing touches (optional): If desired, add a decorative hair accessory such as a headband, scarf, or hairpin to personalize the look and add a touch of style.
Now you have an easy twist and flip bun that’s perfect for any occasion and takes just minutes to create!
8. Loose Messy Updo for Thick Hair
A “Loose Messy Updo for Thick Hair” is a stylish and effortless hairstyle that works well with the natural volume and texture of thick hair. Here’s a step-by-step guide to create a loose messy updo for thick hair:

- Prepare your hair: Start with clean, dry, and tangle-free hair. Apply a texturizing spray or dry shampoo to add some grip and texture to your hair, making it easier to work with.
- Create volume: If your hair is naturally voluminous, you can skip this step. If not, use a teasing brush or comb to gently tease the crown section of your hair for added volume.
- Part your hair: Create a side part or a middle part, depending on your preference.
- Section your hair: Divide your hair into three sections – left, right, and back. Temporarily secure the left and right sections with hair clips to keep them out of the way.
- Create a low messy bun: Working with the back section, gather your hair into a low, loose ponytail and secure it with a hair tie. Twist the ponytail and wrap it around the base to form a loose, messy bun. Secure the bun with bobby pins, making sure to pin any loose strands or sections that need extra support.
- Style the side sections: Release the left and right sections of your hair. Take a small section from the left side, twist it loosely, and wrap it around the messy bun, securing it with bobby pins. Repeat this process with the remaining hair on the left side. Then, move to the right side and do the same.
- Frame your face: Leave a few face-framing pieces out for a softer, more romantic look. You can also use a curling iron or wand to create loose waves for these pieces if desired.
- Adjust and secure: Gently pull at the edges of the updo to create a slightly messier, more relaxed look. Use additional bobby pins to secure any loose hair or sections that need extra support.
- Set the style: Apply a light-hold hairspray to set the hairstyle in place and keep it secure throughout the day.
- Add finishing touches (optional): If desired, add a decorative hair accessory such as a headband, scarf, or hairpin to personalize the look and add a touch of style.
Now you have a beautiful loose messy updo that’s perfect for thick hair and suitable for any occasion!
9. Casual Two Braids and Bun Updo
A “Casual Two Braids and Bun Updo” is a versatile and stylish hairstyle that works well for casual outings, everyday wear, or even special occasions. Here’s a step-by-step guide to create a casual two braids and bun updo:

- Prepare your hair: Start with clean, dry, and tangle-free hair. Apply a light styling cream or leave-in conditioner to help with manageability and smoothness.
- Part your hair: Create a middle part, dividing your hair into two equal sections.
- Create the first braid: Take one of the sections and divide it into three equal parts. Start braiding a regular three-strand braid, working your way down the length of the hair. Secure the end with a small hair tie. You can choose to do a tight braid for a more polished look or a loose braid for a more relaxed appearance.
- Create the second braid: Repeat step 3 with the other section of your hair, creating a matching braid.
- Bring the braids together: Gather the two braids at the nape of your neck and secure them together with a hair tie, creating a low ponytail.
- Create a bun: Twist the ponytail and wrap it around the base to form a bun. Secure the bun with bobby pins, making sure to pin any loose strands or sections that need extra support.
- Adjust and secure: Gently pull at the edges of the bun to make it look slightly looser and more relaxed. You can also loosen the braids slightly by gently tugging at the sides.
- Frame your face: Leave a few face-framing pieces out for a softer, more casual look. You can also use a curling iron or wand to create loose waves for these pieces if desired.
- Set the style: Apply a light-hold hairspray to set the hairstyle in place and keep it secure throughout the day.
- Add finishing touches (optional): If desired, add a decorative hair accessory such as a headband, scarf, or hairpin to personalize the look and add a touch of style.
Now you have a casual two braids and bun updo that’s perfect for any occasion and works well with various hair types and lengths!
10. Colorful Twisted Fishtail Bun
A “Colorful Twisted Fishtail Bun” is a fun and creative hairstyle that combines color and an intricate fishtail braid into a stylish bun. This hairstyle is perfect for special occasions, festivals, or when you want to make a statement. Here’s a step-by-step guide to create a colorful twisted fishtail bun:

- Color your hair (optional): If you want to add color to your hair, you can use temporary hair color sprays, chalks, or semi-permanent dyes. Follow the instructions on the packaging for the specific product you choose. You can also use colorful hair extensions to achieve the same effect without coloring your natural hair.
- Prepare your hair: Start with clean, dry, and tangle-free hair. Apply a heat protectant spray and a light styling cream to help with manageability and protect your hair from heat styling.
- Curl your hair: Using a curling iron or wand, create loose waves throughout your hair. This will add texture and make the fishtail braid more visually appealing.
- Part your hair: Create a side part or middle part, depending on your preference.
- Create a low ponytail: Gather your hair into a low ponytail at the nape of your neck and secure it with a hair tie.
- Start the fishtail braid: Divide the ponytail into two equal sections. Take a small strand of hair from the outer edge of one section and cross it over to the other section. Repeat the process, taking a small strand from the outer edge of the other section and crossing it over to the first section. Continue alternating sides as you work your way down the ponytail.
- Secure the fishtail braid: Once you’ve reached the end of the ponytail, secure the fishtail braid with a small hair tie.
- Twist and wrap the braid: Hold the base of the fishtail braid with one hand and use the other hand to twist the braid slightly. Wrap the twisted braid around the base of the ponytail to form a bun. Ensure the bun is tight enough to hold but not too tight to be uncomfortable.
- Secure the bun: Use bobby pins to secure the bun in place, inserting them through the bun and into the hair tie for a strong hold. Make sure to pin any loose strands or sections that need extra support.
- Adjust and finalize: Gently loosen the fishtail braid and bun by tugging at the edges for a more relaxed and textured appearance. You can also pull out a few strands of hair around your face for a softer, more casual look.
- Set the style: Apply a light-hold hairspray to set the hairstyle in place and keep it secure throughout the day.
- Add finishing touches (optional): If desired, add a decorative hair accessory such as a jeweled hairpin or small flowers to enhance the look and add a touch of elegance.
Now you have a stunning colorful twisted fishtail bun hairstyle that’s perfect for special occasions, festivals, or making a bold statement!
11. Easy Girly Braid and Bun
An “Easy Girly Braid and Bun” hairstyle is a simple yet stylish look that’s perfect for casual outings, everyday wear, or even special occasions when you want a feminine touch. Here’s a step-by-step guide to create an easy girly braid and bun:

- Prepare your hair: Start with clean, dry, and tangle-free hair. Apply a light styling cream or leave-in conditioner to help with manageability and smoothness.
- Part your hair: Create a side part or a middle part, depending on your preference.
- Section your hair: Divide your hair into two sections – left and right. Temporarily secure the left section with a hair clip to keep it out of the way.
- Create a braid: Working with the right section, divide it into three equal parts. Start braiding a regular three-strand braid, working your way down the length of the hair. Secure the end with a small hair tie. You can choose to do a tight braid for a more polished look or a loose braid for a more relaxed appearance.
- Gather your hair: Release the left section of your hair and combine it with the braided right section. Gather all your hair at the nape of your neck and secure it with a hair tie, creating a low ponytail.
- Create a bun: Twist the ponytail and wrap it around the base to form a bun. Secure the bun with bobby pins, making sure to pin any loose strands or sections that need extra support.
- Adjust and secure: Gently pull at the edges of the bun to make it look slightly looser and more relaxed. You can also loosen the braid slightly by gently tugging at the sides.
- Frame your face: Leave a few face-framing pieces out for a softer, more casual look. You can also use a curling iron or wand to create loose waves for these pieces if desired.
- Set the style: Apply a light-hold hairspray to set the hairstyle in place and keep it secure throughout the day.
- Add finishing touches (optional): If desired, add a decorative hair accessory such as a headband, scarf, or hairpin to personalize the look and add a touch of style.
Now you have an easy girly braid and bun that’s perfect for any occasion and works well with various hair types and lengths!
12. Feminine Braided Chignon Updo
A “Feminine Braided Chignon Updo” is an elegant and romantic hairstyle that’s perfect for special occasions, weddings, or formal events. Here’s a step-by-step guide to create a feminine braided chignon updo:

- Prepare your hair: Start with clean, dry, and tangle-free hair. Apply a heat protectant spray and a light styling cream or mousse to help with manageability and provide a better grip for braiding.
- Part your hair: Create a side part or middle part, depending on your preference.
- Section your hair: Divide your hair into three sections – left, right, and back. Temporarily secure the left and right sections with hair clips to keep them out of the way.
- Create a low ponytail: Gather the back section of your hair into a low ponytail at the nape of your neck and secure it with a hair tie.
- Braid the ponytail: Divide the ponytail into three equal parts and create a classic three-strand braid. Secure the end of the braid with a small hair tie.
- Create a chignon: Roll the braided ponytail upwards and tuck it under itself, creating a chignon shape. Secure the chignon to the back of your head with bobby pins, making sure to pin any loose strands or sections that need extra support.
- Style the side sections: Release the left and right sections of your hair. Take a small section from the left side, twist it loosely, and wrap it around the chignon, securing it with bobby pins. Repeat this process with the remaining hair on the left side. Then, move to the right side and do the same.
- Frame your face: Leave a few face-framing pieces out for a softer, more romantic look. You can also use a curling iron or wand to create loose waves for these pieces if desired.
- Adjust and secure: Gently pull at the edges of the chignon and the twisted side sections to create a slightly looser, more relaxed look. Use additional bobby pins to secure any loose hair or sections that need extra support.
- Set the style: Apply a strong-hold hairspray to set the hairstyle in place and keep it secure throughout the day or night.
- Add finishing touches (optional): If desired, add a decorative hair accessory such as a jeweled hairpin, comb, or small flowers to enhance the elegance of the look.
Now you have a beautiful and sophisticated feminine braided chignon updo that’s perfect for special occasions and formal events!
13. Textured Chignon Updo
A “Textured Chignon Updo” is an elegant yet effortless hairstyle that’s perfect for special occasions, weddings, or formal events. Here’s a step-by-step guide to create a textured chignon updo:

- Prepare your hair: Start with clean, dry, and tangle-free hair. Apply a texturizing spray or dry shampoo to add some grip and texture to your hair, making it easier to work with.
- Create volume: If your hair is naturally voluminous, you can skip this step. If not, use a teasing brush or comb to gently tease the crown section of your hair for added volume.
- Part your hair: Create a side part or middle part, depending on your preference.
- Divide your hair: Divide your hair into two sections – left and right – from the back of your head down to the nape of your neck.
- Create a low ponytail: Gather both sections at the nape of your neck and twist them together to create a low ponytail. Secure the ponytail with a hair tie.
- Create a chignon: Twist the ponytail and wrap it around the base to form a chignon. Tuck the end of the ponytail under the chignon and secure it with bobby pins. Make sure to pin any loose strands or sections that need extra support.
- Add texture: Gently pull at the edges of the chignon to loosen it and create a slightly messier, more textured look. You can also use your fingers to rough up the hair at the crown and around the chignon for a more lived-in appearance.
- Frame your face: Leave a few face-framing pieces out for a softer, more casual look. You can also use a curling iron or wand to create loose waves for these pieces if desired.
- Adjust and secure: Check the overall balance of the updo and use additional bobby pins to secure any loose hair or sections that need extra support.
- Set the style: Apply a light-hold hairspray to set the hairstyle in place and keep it secure throughout the day or night.
- Add finishing touches (optional): If desired, add a decorative hair accessory such as a jeweled hairpin, comb, or small flowers to enhance the elegance of the look.
Now you have a stylish and elegant textured chignon updo that’s perfect for special occasions and formal events!
14. Bubble Gum Pink Dutch Braid Bun
A “Bubble Gum Pink Dutch Braid Bun” hairstyle is a playful and creative look that combines a fun color with an intricate Dutch braid and a stylish bun. This hairstyle is perfect for special occasions, festivals, or when you want to make a statement. Here’s a step-by-step guide to create a bubble gum pink Dutch braid bun:

- Color your hair (optional): If you want to color your hair bubble gum pink, you can use temporary hair color sprays, chalks, or semi-permanent dyes. Follow the instructions on the packaging for the specific product you choose. You can also use colorful hair extensions to achieve the same effect without coloring your natural hair.
- Prepare your hair: Start with clean, dry, and tangle-free hair. Apply a heat protectant spray and a light styling cream or mousse to help with manageability and provide a better grip for braiding.
- Part your hair: Create a side part or middle part, depending on your preference.
- Begin the Dutch braid: Divide your hair into three equal sections. Starting from the front, cross the right strand under the middle strand, then cross the left strand under the new middle strand. This is the first stitch of the Dutch braid.
- Continue the Dutch braid: As you continue to braid, add small sections of hair from each side to the outer strands before crossing them under the middle strand. Work your way down the length of your hair, keeping the braid close to your head.
- Secure the braid: Once you’ve reached the nape of your neck, finish the braid by creating a regular three-strand braid with the remaining hair. Secure the end of the braid with a small hair tie.
- Create the bun: Hold the base of the braid with one hand and use the other hand to twist the braid slightly. Wrap the twisted braid around the base of the ponytail to form a bun. Ensure the bun is tight enough to hold but not too tight to be uncomfortable.
- Secure the bun: Use bobby pins to secure the bun in place, inserting them through the bun and into the hair for a strong hold. Make sure to pin any loose strands or sections that need extra support.
- Adjust and finalize: Gently loosen the Dutch braid and bun by tugging at the edges for a more relaxed and textured appearance. You can also pull out a few strands of hair around your face for a softer, more casual look.
- Set the style: Apply a light-hold hairspray to set the hairstyle in place and keep it secure throughout the day.
- Add finishing touches (optional): If desired, add a decorative hair accessory such as a jeweled hairpin or small flowers to enhance the look and add a touch of style.
Now you have a stunning bubble gum pink Dutch braid bun hairstyle that’s perfect for special occasions, festivals, or making a bold statement!
15. Angelic Fishtail Crown Braid
An “Angelic Fishtail Crown Braid” is a romantic and ethereal hairstyle that’s perfect for special occasions, weddings, or when you want to feel like a fairy-tale princess. Here’s a step-by-step guide to create an angelic fishtail crown braid:

- Prepare your hair: Start with clean, dry, and tangle-free hair. Apply a light styling cream or leave-in conditioner to help with manageability and smoothness. Optionally, you can add some texture to your hair with a texturizing spray or dry shampoo for better grip during braiding.
- Part your hair: Create a side part or middle part, depending on your preference.
- Section your hair: Divide your hair into two equal sections at the back of your head.
- Start the fishtail braid: Working on one side, divide the section into two smaller sections. Take a small strand of hair from the outer edge of one smaller section and cross it over to the other smaller section. Repeat the process, taking a small strand from the outer edge of the other smaller section and crossing it over to the first smaller section. Continue alternating sides as you work your way down the length of the hair.
- Secure the fishtail braid: Once you’ve reached the end of the hair section, secure the fishtail braid with a small hair tie.
- Repeat on the other side: Repeat steps 4 and 5 to create a fishtail braid with the other hair section.
- Gently loosen the braids: Carefully tug at the edges of each fishtail braid to make them look fuller and slightly more relaxed.
- Create the crown: Take one of the fishtail braids and drape it across the top of your head, positioning it like a headband or crown. Secure the braid in place with bobby pins, inserting them through the braid and into your hair for a strong hold.
- Finish the crown: Take the other fishtail braid and drape it over the first braid, creating a double-layered crown effect. Tuck the end of the second braid under the first braid to hide the hair tie, and secure it with bobby pins.
- Adjust and secure: Check the overall balance of the crown braid and use additional bobby pins to secure any loose hair or sections that need extra support.
- Frame your face: Leave a few face-framing pieces out for a softer, more romantic look. You can also use a curling iron or wand to create loose waves for these pieces if desired.
- Set the style: Apply a light-hold hairspray to set the hairstyle in place and keep it secure throughout the day or night.
- Add finishing touches (optional): If desired, add a decorative hair accessory such as a jeweled hairpin, comb, or small flowers to enhance the elegance of the look.
Now you have a beautiful and romantic angelic fishtail crown braid that’s perfect for special occasions, weddings, or when you want to feel like a fairy-tale princess!
16. Messy Chignon with Fishtail Braid
A “Messy Chignon with Fishtail Braid” is a stylish and romantic hairstyle that combines a relaxed chignon with a chic fishtail braid. It’s perfect for special occasions, weddings, or when you want an effortlessly elegant look. Here’s a step-by-step guide to create a messy chignon with a fishtail braid:

- Prepare your hair: Start with clean, dry, and tangle-free hair. Apply a texturizing spray or dry shampoo to add some grip and texture to your hair, making it easier to work with.
- Section your hair: Take a section of hair from the front, near your forehead, and separate it from the rest of your hair. Clip the rest of your hair out of the way.
- Create the fishtail braid: Divide the front section into two smaller sections. Take a small strand of hair from the outer edge of one smaller section and cross it over to the other smaller section. Repeat the process, taking a small strand from the outer edge of the other smaller section and crossing it over to the first smaller section. Continue alternating sides as you work your way down the length of the hair.
- Secure the fishtail braid: Once you’ve reached the end of the hair section, secure the fishtail braid with a small hair tie.
- Gently loosen the braid: Carefully tug at the edges of the fishtail braid to make it look fuller and slightly more relaxed.
- Create a low ponytail: Unclip the rest of your hair and gather it into a low ponytail at the nape of your neck. Incorporate the fishtail braid into the ponytail and secure it with a hair tie.
- Create the chignon: Twist the ponytail and wrap it around the base to form a chignon. Tuck the end of the ponytail under the chignon and secure it with bobby pins. Make sure to pin any loose strands or sections that need extra support.
- Add texture: Gently pull at the edges of the chignon to loosen it and create a slightly messier, more textured look. You can also use your fingers to rough up the hair at the crown and around the chignon for a more lived-in appearance.
- Frame your face: Leave a few face-framing pieces out for a softer, more casual look. You can also use a curling iron or wand to create loose waves for these pieces if desired.
- Adjust and secure: Check the overall balance of the updo and use additional bobby pins to secure any loose hair or sections that need extra support.
- Set the style: Apply a light-hold hairspray to set the hairstyle in place and keep it secure throughout the day or night.
- Add finishing touches (optional): If desired, add a decorative hair accessory such as a jeweled hairpin, comb, or small flowers to enhance the elegance of the look.
Now you have a stylish and romantic messy chignon with a fishtail braid that’s perfect for special occasions, weddings, or when you want an effortlessly elegant look!
17. Gorgeous Messy Updo with Deconstructed Fishtail
A “Gorgeous Messy Updo with Deconstructed Fishtail” is a chic and modern hairstyle that combines a relaxed updo with a deconstructed fishtail braid. It’s perfect for special occasions, weddings, or when you want a sophisticated yet effortless look. Here’s a step-by-step guide to create a gorgeous messy updo with a deconstructed fishtail:

- Prepare your hair: Start with clean, dry, and tangle-free hair. Apply a texturizing spray or dry shampoo to add some grip and texture to your hair, making it easier to work with.
- Create a side part: Create a deep side part, depending on your preference.
- Divide your hair: Divide your hair into three sections – left, right, and back. Clip the left and right sections out of the way for now.
- Create a low ponytail: Gather the back section of your hair into a low ponytail at the nape of your neck and secure it with a hair tie.
- Deconstruct the fishtail braid: Take the right section of your hair and create a loose fishtail braid. To do this, divide the section into two smaller sections. Take a small strand of hair from the outer edge of one smaller section and cross it over to the other smaller section. Repeat the process, taking a small strand from the outer edge of the other smaller section and crossing it over to the first smaller section. Continue alternating sides as you work your way down the length of the hair. Once you’ve braided the entire section, gently tug at the edges of the braid to create a deconstructed and voluminous look.
- Secure the fishtail braid: Once you’ve reached the end of the hair section, secure the fishtail braid with a small hair tie.
- Incorporate the fishtail braid: Drape the deconstructed fishtail braid over the low ponytail and secure it with bobby pins.
- Create a messy bun: Twist the low ponytail and wrap it around the base to form a messy bun. Tuck the end of the ponytail under the bun and secure it with bobby pins. Make sure to pin any loose strands or sections that need extra support.
- Incorporate the left section: Take the left section of your hair and loosely twist it, then drape it over the messy bun. Secure the twisted section with bobby pins.
- Frame your face: Leave a few face-framing pieces out for a softer, more romantic look. You can also use a curling iron or wand to create loose waves for these pieces if desired.
- Adjust and secure: Check the overall balance of the updo and use additional bobby pins to secure any loose hair or sections that need extra support.
- Set the style: Apply a light-hold hairspray to set the hairstyle in place and keep it secure throughout the day or night.
- Add finishing touches (optional): If desired, add a decorative hair accessory such as a jeweled hairpin, comb, or small flowers to enhance the elegance of the look.
Now you have a chic and sophisticated gorgeous messy updo with a deconstructed fishtail that’s perfect for special occasions, weddings, or when you want a modern yet effortless look!
18. Sultry Low Bun with a Twist
A “Sultry Low Bun with a Twist” is a sophisticated and elegant hairstyle that combines a sleek low bun with a twisted detail. It’s perfect for special occasions, weddings, or when you want a polished yet sexy look. Here’s a step-by-step guide to create a sultry low bun with a twist:

- Prepare your hair: Start with clean, dry, and tangle-free hair. Apply a heat protectant spray and a smoothing serum to help with manageability and to create a sleek, polished finish.
- Straighten your hair (optional): If your hair is not already straight, use a flat iron to straighten it for a smooth, sleek base.
- Create a side part: Create a deep side part, depending on your preference.
- Section your hair: Divide your hair into two sections – left and right. Clip the left section out of the way for now.
- Create the twist: Take the right section of your hair and start twisting it from the roots, gradually adding more hair as you work your way down. Keep the twist tight and close to your scalp for a sleek look.
- Incorporate the twist into a low ponytail: When you reach the nape of your neck, gather the twisted section and the remaining hair into a low ponytail. Secure it with a hair tie.
- Create the low bun: Twist the ponytail and wrap it around the base to form a tight, sleek low bun. Tuck the end of the ponytail under the bun and secure it with bobby pins. Make sure to pin any loose strands or sections that need extra support.
- Frame your face: If you want a softer look, leave a few face-framing pieces out and use a flat iron to create gentle waves or curls.
- Adjust and secure: Check the overall balance of the low bun and use additional bobby pins to secure any loose hair or sections that need extra support.
- Set the style: Apply a strong-hold hairspray to set the hairstyle in place and keep it secure throughout the day or night.
- Add finishing touches (optional): If desired, add a decorative hair accessory such as a jeweled hairpin, comb, or small flowers to enhance the elegance of the look.
Now you have a sophisticated and elegant sultry low bun with a twist that’s perfect for special occasions, weddings, or when you want a polished yet sexy look!
19. Cute Twist Up with Loose Bangs
A “Cute Twist Up with Loose Bangs” hairstyle is a playful and casual updo that combines twisted sections and loose bangs for a fun and flirty look. It’s perfect for everyday wear, parties, or when you want an effortless yet chic style. Here’s a step-by-step guide to create a cute twist up with loose bangs:

- Prepare your hair: Start with clean, dry, and tangle-free hair. Apply a light styling cream or leave-in conditioner to help with manageability and to create a smooth, polished finish.
- Create a side part: Create a side part, depending on your preference.
- Section your hair: Divide your hair into three sections – left, right, and back. Clip the back section out of the way for now.
- Create the first twist: Take the left section of your hair and start twisting it from the roots, gradually adding more hair as you work your way down. Keep the twist fairly loose for a more relaxed look.
- Secure the first twist: When you reach the back of your head, pin the twisted section in place with bobby pins. Make sure to insert the pins in the same direction as the twist for a secure hold.
- Create the second twist: Repeat steps 4 and 5 with the right section of your hair.
- Create a low ponytail: Unclip the back section of your hair and gather it into a low ponytail at the nape of your neck, incorporating the twisted sections. Secure it with a hair tie.
- Create the twist up: Twist the low ponytail and wrap it around the base to form a loose, relaxed bun. Tuck the end of the ponytail under the bun and secure it with bobby pins. Make sure to pin any loose strands or sections that need extra support.
- Frame your face: Leave a few face-framing pieces out, including your bangs, for a softer, more casual look. You can also use a curling iron or wand to create loose waves for these pieces if desired.
- Adjust and secure: Check the overall balance of the twist up and use additional bobby pins to secure any loose hair or sections that need extra support.
- Set the style: Apply a light-hold hairspray to set the hairstyle in place and keep it secure throughout the day or night.
Now you have a playful and casual cute twist up with loose bangs that’s perfect for everyday wear, parties, or when you want an effortless yet chic style!
20. Knotted Side Bun with Wrap Around
A “Knotted Side Bun with Wrap Around” hairstyle is a unique and elegant updo that combines a knotted side bun with a wrap-around detail. It’s perfect for special occasions, weddings, or when you want a sophisticated and stylish look. Here’s a step-by-step guide to create a knotted side bun with wrap around:

- Prepare your hair: Start with clean, dry, and tangle-free hair. Apply a styling cream or smoothing serum to help with manageability and to create a smooth, polished finish.
- Create a side part: Create a side part, depending on your preference.
- Section your hair: Divide your hair into two sections – left and right. Clip the right section out of the way for now.
- Create a low side ponytail: Gather the left section of your hair into a low side ponytail, just behind your left ear, and secure it with a hair tie.
- Split the ponytail: Split the side ponytail into two equal sections.
- Create the knot: Take the two sections of the side ponytail and tie them into a simple knot, as if you were tying a shoelace.
- Secure the knot: Use bobby pins to secure the knot in place, making sure to pin any loose strands or sections that need extra support.
- Create the wrap-around detail: Unclip the right section of your hair and start twisting it from the roots, gradually adding more hair as you work your way down. Keep the twist tight and close to your scalp for a sleek look.
- Wrap the twisted section: Drape the twisted section around the base of the knotted side bun, making sure to cover the hair tie. Tuck the end of the twisted section under the bun and secure it with bobby pins.
- Frame your face: If you want a softer look, leave a few face-framing pieces out and use a curling iron or wand to create gentle waves or curls.
- Adjust and secure: Check the overall balance of the knotted side bun and use additional bobby pins to secure any loose hair or sections that need extra support.
- Set the style: Apply a strong-hold hairspray to set the hairstyle in place and keep it secure throughout the day or night.
- Add finishing touches (optional): If desired, add a decorative hair accessory such as a jeweled hairpin, comb, or small flowers to enhance the elegance of the look.
Now you have a unique and elegant knotted side bun with wrap around that’s perfect for special occasions, weddings, or when you want a sophisticated and stylish look!
21. Low Rolled Bun Messy Updo
A “Low Rolled Bun Messy Updo” is a chic and effortless hairstyle that combines a low rolled bun with a messy, tousled finish. It’s perfect for casual events, parties, or when you want a stylish yet relaxed look. Here’s a step-by-step guide to create a low rolled bun messy updo:

- Prepare your hair: Start with clean, dry, and tangle-free hair. Apply a texturizing spray or dry shampoo to add some grip and texture to your hair, making it easier to work with.
- Create a side part: Create a side part, depending on your preference.
- Tease your hair: To add volume and texture to your hair, gently tease the hair at the crown of your head using a fine-toothed comb.
- Gather your hair: Gather your hair into a low ponytail at the nape of your neck. Don’t worry about making it too neat or perfect, as the messy look is part of the style.
- Create a small hole: Just above the hair tie, create a small hole in your hair, big enough to fit the ponytail through.
- Flip the ponytail: Pull the ponytail through the hole, creating a topsy-turvy ponytail. This will create a twisted effect at the base of the ponytail.
- Roll the bun: Take the ends of the ponytail and roll them upwards, tucking them into the twisted base. Keep rolling until the bun is tight against your head.
- Secure the bun: Use bobby pins to secure the rolled bun in place, making sure to pin any loose strands or sections that need extra support.
- Create a messy finish: Gently tug on the sides of the bun to loosen it and create a more casual, messy look. Pull out a few face-framing pieces for a softer, more relaxed appearance.
- Adjust and secure: Check the overall balance of the low rolled bun and use additional bobby pins to secure any loose hair or sections that need extra support.
- Set the style: Apply a light-hold hairspray to set the hairstyle in place and keep it secure throughout the day or night.
Now you have a chic and effortless low rolled bun messy updo that’s perfect for casual events, parties, or when you want a stylish yet relaxed look!
22. High Bun for Long Hair
A “High Bun for Long Hair” is a classic and timeless hairstyle that works well for various occasions, from casual days to formal events. It’s perfect for keeping long hair up and away from the face. Here’s a step-by-step guide to create a high bun for long hair:

- Prepare your hair: Start with clean, dry, and tangle-free hair. Apply a light styling cream or leave-in conditioner to help with manageability and to create a smooth, polished finish. You can also use a hairbrush to remove any knots and ensure your hair is smooth.
- Create a high ponytail: Gather your hair into a high ponytail at the crown of your head. Ensure the ponytail is centered and secure it with a hair tie. For added lift, you can tease the hair at the crown of your head before pulling it into the ponytail.
- Twist the ponytail: Take the entire length of the ponytail and twist it in one direction until it’s tight.
- Wrap the bun: Wrap the twisted ponytail around the base of the hair tie to create a high bun. Ensure the hair is wrapped evenly and smoothly around the base.
- Secure the bun: Tuck the end of the twisted ponytail under the bun and secure it with bobby pins. Make sure to pin any loose strands or sections that need extra support.
- Smooth any flyaways: Use a fine-tooth comb or a clean, soft-bristle brush to smooth any flyaways around the base of the bun. You can also use a small amount of hairspray or a light pomade to help tame any stray hairs.
- Frame your face (optional): If you want a softer look, leave a few face-framing pieces out and use a curling iron or wand to create gentle waves or curls.
- Adjust and secure: Check the overall balance of the high bun and use additional bobby pins to secure any loose hair or sections that need extra support.
- Set the style: Apply a strong-hold hairspray to set the hairstyle in place and keep it secure throughout the day or night.
- Add finishing touches (optional): If desired, add a decorative hair accessory such as a jeweled hairpin, comb, or small flowers to enhance the elegance of the look.
Now you have a classic and timeless high bun for long hair that’s perfect for various occasions, from casual days to formal events!
23. Formal Hairstyle for Long Hair
A “Formal Hairstyle for Long Hair” can take many forms, but a popular and elegant option is a side-swept cascade of curls. This sophisticated style is perfect for special occasions like weddings, proms, or any event where you want to look your best. Here’s a step-by-step guide to create a formal hairstyle for long hair:

- Prepare your hair: Start with clean, dry, and tangle-free hair. Apply a heat protectant spray and a smoothing serum to help with manageability and to create a smooth, polished finish.
- Create a side part: Create a deep side part, depending on your preference.
- Curl your hair: Using a curling iron or wand, curl your entire head of hair in 1-2 inch sections. For a more glamorous look, curl your hair away from your face. Allow the curls to cool down and set before moving on to the next step.
- Brush out the curls: Gently brush through the curls using a wide-tooth comb or your fingers to create soft, cascading waves.
- Sweep your hair to one side: Gather the majority of your hair to one side, just below your ear, while leaving some face-framing pieces on the other side.
- Secure the side-swept hair: Use bobby pins to secure the side-swept hair in place, placing them in an upward direction to hold the hair in place and create a slight lift. Make sure to hide the bobby pins within the curls for a seamless look.
- Add volume: Gently tease the hair at the crown of your head using a fine-toothed comb or a teasing brush to create added volume and lift.
- Smooth any flyaways: Use a fine-tooth comb or a clean, soft-bristle brush to smooth any flyaways around the base of the style. You can also use a small amount of hairspray or a light pomade to help tame any stray hairs.
- Set the style: Apply a strong-hold hairspray to set the hairstyle in place and keep it secure throughout the day or night.
- Add finishing touches (optional): If desired, add a decorative hair accessory such as a jeweled hairpin, comb, or small flowers to enhance the elegance of the look.
Now you have a sophisticated and elegant formal hairstyle for long hair that’s perfect for special occasions like weddings, proms, or any event where you want to look your best!
24. Messy Updo with a Center Twist
A “Messy Updo with a Center Twist” is a fun and stylish hairstyle that combines a messy updo with a unique center twist detail. It’s perfect for casual outings, parties, or when you want an effortlessly chic look. Here’s a step-by-step guide to create a messy updo with a center twist:

- Prepare your hair: Start with clean, dry, and tangle-free hair. Apply a texturizing spray or dry shampoo to add some grip and texture to your hair, making it easier to work with.
- Create a center part: Using a comb, create a center part that runs from the front of your head to the nape of your neck, dividing your hair into two equal sections.
- Create the center twist: Take the left section of your hair and start twisting it from the roots, gradually adding more hair as you work your way down. Keep the twist fairly loose for a more relaxed look. Once you reach the nape of your neck, secure the twist temporarily with a hair clip or hair tie.
- Repeat on the other side: Repeat step 3 with the right section of your hair, creating a matching twist that meets the first twist at the nape of your neck.
- Combine the twists: Remove the hair clip or hair tie from the first twist and combine both twists together into a low ponytail. Secure it with a hair tie.
- Create a messy bun: Wrap the ponytail around the base to form a loose, messy bun. Tuck the end of the ponytail under the bun and secure it with bobby pins. Make sure to pin any loose strands or sections that need extra support.
- Loosen the twists: Gently tug on the sides of the twists to loosen them and create a more casual, messy look.
- Frame your face: Pull out a few face-framing pieces for a softer, more relaxed appearance. You can also use a curling iron or wand to create loose waves for these pieces if desired.
- Adjust and secure: Check the overall balance of the messy updo and use additional bobby pins to secure any loose hair or sections that need extra support.
- Set the style: Apply a light-hold hairspray to set the hairstyle in place and keep it secure throughout the day or night.
Now you have a fun and stylish messy updo with a center twist that’s perfect for casual outings, parties, or when you want an effortlessly chic look!
25. Braided Updo for Long Hair
A “Braided Updo for Long Hair” is an elegant and timeless hairstyle that works well for various occasions, from casual outings to formal events. It involves incorporating braids into an updo for a unique and stylish look. Here’s a step-by-step guide to create a braided updo for long hair:

- Prepare your hair: Start with clean, dry, and tangle-free hair. Apply a light styling cream or leave-in conditioner to help with manageability and to create a smooth, polished finish.
- Create a side part: Create a side part, depending on your preference.
- Section your hair: Divide your hair into three sections – left, right, and back.
- Braid the side sections: Starting with the left section, create a Dutch or French braid, beginning at your hairline and working your way down towards the nape of your neck. Secure the end of the braid with a small hair tie. Repeat the same process with the right section.
- Create a low ponytail: Gather the back section of your hair and the two braids into a low ponytail at the nape of your neck. Remove the small hair ties from the braids and secure the entire ponytail with a hair tie.
- Braid the ponytail: Braid the ponytail all the way down to the ends and secure it with a hair tie.
- Create the bun: Wrap the braided ponytail around the base of the hair tie to create a braided bun. Ensure the hair is wrapped evenly and smoothly around the base.
- Secure the bun: Tuck the end of the braided ponytail under the bun and secure it with bobby pins. Make sure to pin any loose strands or sections that need extra support.
- Frame your face (optional): If you want a softer look, leave a few face-framing pieces out and use a curling iron or wand to create gentle waves or curls.
- Adjust and secure: Check the overall balance of the braided updo and use additional bobby pins to secure any loose hair or sections that need extra support.
- Set the style: Apply a strong-hold hairspray to set the hairstyle in place and keep it secure throughout the day or night.
- Add finishing touches (optional): If desired, add a decorative hair accessory such as a jeweled hairpin, comb, or small flowers to enhance the elegance of the look.
Now you have an elegant and timeless braided updo for long hair that’s perfect for various occasions, from casual outings to formal events!
26. Messy Updo with a Bun
A “Messy Updo with a Bun” is a relaxed and stylish hairstyle perfect for casual outings, parties, or when you want an effortlessly chic look. This hairstyle combines a messy updo with a loose bun for a playful and fashionable appearance. Here’s a step-by-step guide to create a messy updo with a bun:

- Prepare your hair: Start with clean, dry, and tangle-free hair. Apply a texturizing spray or dry shampoo to add some grip and texture to your hair, making it easier to work with.
- Create a side or center part: Depending on your preference, create a side or center part using a comb.
- Tease your hair: To add volume and texture to your hair, gently tease the hair at the crown of your head using a fine-toothed comb.
- Gather your hair: Gather your hair into a loose, low ponytail at the nape of your neck. Don’t worry about making it too neat or perfect, as the messy look is part of the style.
- Create the messy bun: Hold the base of the ponytail with one hand and use the other hand to twist the ponytail around itself to create a loose bun. Ensure the bun is centered at the nape of your neck.
- Secure the bun: Use bobby pins to secure the messy bun in place, making sure to pin any loose strands or sections that need extra support. You can also use a hair tie to secure the bun before pinning it for added stability.
- Create a messy finish: Gently tug on the sides of the bun to loosen it and create a more casual, messy look. Pull out a few face-framing pieces for a softer, more relaxed appearance.
- Adjust and secure: Check the overall balance of the messy updo with a bun and use additional bobby pins to secure any loose hair or sections that need extra support.
- Set the style: Apply a light-hold hairspray to set the hairstyle in place and keep it secure throughout the day or night.
Now you have a relaxed and stylish messy updo with a bun that’s perfect for casual outings, parties, or when you want an effortlessly chic look!
27. Crimped and Braided Updo
A “Crimped and Braided Updo” is a unique and stylish hairstyle that combines crimped hair with braids to create an eye-catching look. This hairstyle is perfect for parties, special events, or when you want to make a fashion statement. Here’s a step-by-step guide to create a crimped and braided updo:

- Prepare your hair: Start with clean, dry, and tangle-free hair. Apply a heat protectant spray to protect your hair from heat damage.
- Crimp your hair: Using a crimping iron, crimp your entire head of hair in small sections to create texture and volume. Allow the crimped sections to cool down before moving on to the next step.
- Create a side part: Create a side part, depending on your preference.
- Section your hair: Divide your hair into three sections – left, right, and back.
- Braid the side sections: Starting with the left section, create a Dutch or French braid, beginning at your hairline and working your way down towards the nape of your neck. Secure the end of the braid with a small hair tie. Repeat the same process with the right section.
- Create a low ponytail: Gather the back section of your hair and the two braids into a low ponytail at the nape of your neck. Remove the small hair ties from the braids and secure the entire ponytail with a hair tie.
- Braid the ponytail: Braid the crimped ponytail all the way down to the ends and secure it with a hair tie.
- Create the bun: Wrap the braided ponytail around the base of the hair tie to create a braided bun. Ensure the hair is wrapped evenly and smoothly around the base.
- Secure the bun: Tuck the end of the braided ponytail under the bun and secure it with bobby pins. Make sure to pin any loose strands or sections that need extra support.
- Frame your face (optional): If you want a softer look, leave a few face-framing pieces out and use a curling iron or wand to create gentle waves or curls.
- Adjust and secure: Check the overall balance of the crimped and braided updo and use additional bobby pins to secure any loose hair or sections that need extra support.
- Set the style: Apply a strong-hold hairspray to set the hairstyle in place and keep it secure throughout the day or night.
- Add finishing touches (optional): If desired, add a decorative hair accessory such as a jeweled hairpin, comb, or small flowers to enhance the elegance of the look.
Now you have a unique and stylish crimped and braided updo that’s perfect for parties, special events, or when you want to make a fashion statement!
28. Metallic Messy Bun
A “Metallic Messy Bun” is a playful and trendy hairstyle that adds a touch of metallic sparkle to a casual messy bun. It’s perfect for parties, festivals, or when you want to add a little extra flair to your look. Here’s a step-by-step guide to create a metallic messy bun:

- Prepare your hair: Start with clean, dry, and tangle-free hair. Apply a texturizing spray or dry shampoo to add some grip and texture to your hair, making it easier to work with.
- Apply metallic hair paint or spray: Choose a metallic hair paint or spray in your desired color, such as gold, silver, or rose gold. Follow the instructions on the product to apply it evenly to your hair, focusing on the area where you want the most metallic effect (typically the top layer of your hair). Allow the product to dry before moving on to the next step.
- Create a high ponytail: Gather your hair into a high ponytail at the crown of your head. Don’t worry about making it too neat or perfect, as the messy look is part of the style. Secure the ponytail with a hair tie.
- Create the messy bun: Hold the base of the ponytail with one hand and use the other hand to twist the ponytail around itself to create a loose bun. Ensure the bun is centered on the crown of your head.
- Secure the bun: Use bobby pins to secure the messy bun in place, making sure to pin any loose strands or sections that need extra support. You can also use a hair tie to secure the bun before pinning it for added stability.
- Create a messy finish: Gently tug on the sides of the bun to loosen it and create a more casual, messy look. Pull out a few face-framing pieces for a softer, more relaxed appearance.
- Adjust and secure: Check the overall balance of the metallic messy bun and use additional bobby pins to secure any loose hair or sections that need extra support.
- Set the style: Apply a light-hold hairspray to set the hairstyle in place and keep it secure throughout the day or night.
Now you have a playful and trendy metallic messy bun that’s perfect for parties, festivals, or when you want to add a little extra flair to your look!
29. Elegant Updo for Long Hair
An “Elegant Updo for Long Hair” is a classic and sophisticated hairstyle that’s perfect for formal events, weddings, or other special occasions. This hairstyle creates a polished and refined look that complements any elegant attire. Here’s a step-by-step guide to create an elegant updo for long hair:

- Prepare your hair: Start with clean, dry, and tangle-free hair. Apply a light styling cream or leave-in conditioner to help with manageability and to create a smooth, polished finish.
- Create a side or center part: Depending on your preference, create a side or center part using a comb.
- Section your hair: Divide your hair into two sections – top and bottom. Clip the top section away for now.
- Create a low ponytail: Gather the bottom section of your hair into a low ponytail at the nape of your neck. Secure it with a hair tie.
- Create a bun: Twist the ponytail and wrap it around the base of the hair tie to create a neat, low bun. Tuck the end of the ponytail under the bun and secure it with bobby pins.
- Release the top section: Unclip the top section of your hair and gently tease the hair at the crown of your head to create some volume.
- Smooth the top section: Use a comb or your fingers to smooth the teased hair, maintaining the volume at the crown.
- Integrate the top section with the bun: Gather the smoothed top section and drape it over the bun. Tuck the ends under the bun and secure them with bobby pins. Make sure the hair drapes gracefully over the bun and seamlessly integrates with it.
- Frame your face (optional): If you want a softer look, leave a few face-framing pieces out and use a curling iron or wand to create gentle waves or curls.
- Adjust and secure: Check the overall balance of the elegant updo and use additional bobby pins to secure any loose hair or sections that need extra support.
- Set the style: Apply a strong-hold hairspray to set the hairstyle in place and keep it secure throughout the day or night.
- Add finishing touches (optional): If desired, add a decorative hair accessory such as a jeweled hairpin, comb, or small flowers to enhance the elegance of the look.
Now you have a classic and sophisticated elegant updo for long hair that’s perfect for formal events, weddings, or other special occasions!
30. Garden Party Updo
A “Garden Party Updo” is a romantic and whimsical hairstyle that’s perfect for outdoor events, weddings, or other special occasions held in a garden or natural setting. This hairstyle features loose, textured waves and delicate braids, often adorned with flowers or other nature-inspired hair accessories. Here’s a step-by-step guide to create a garden party updo:

- Prepare your hair: Start with clean, dry, and tangle-free hair. Apply a heat protectant spray to protect your hair from heat damage.
- Create loose waves: Using a curling iron or wand, create loose, textured waves throughout your hair. Allow the curls to cool down before moving on to the next step.
- Create a side or center part: Depending on your preference, create a side or center part using a comb.
- Section your hair: Divide your hair into three sections – left, right, and back.
- Braid the side sections: Starting with the left section, create a loose Dutch or French braid, beginning at your hairline and working your way down towards the nape of your neck. Secure the end of the braid with a small hair tie. Repeat the same process with the right section.
- Create a low ponytail: Gather the back section of your hair and the two braids into a low ponytail at the nape of your neck. Remove the small hair ties from the braids and secure the entire ponytail with a hair tie.
- Create a loose bun: Hold the base of the ponytail with one hand and use the other hand to twist the ponytail around itself to create a loose bun. Ensure the bun is centered at the nape of your neck.
- Secure the bun: Tuck the end of the ponytail under the bun and secure it with bobby pins. Make sure to pin any loose strands or sections that need extra support.
- Frame your face: Leave a few face-framing pieces out and use a curling iron or wand to create gentle waves or curls for a softer, more romantic look.
- Adjust and secure: Check the overall balance of the garden party updo and use additional bobby pins to secure any loose hair or sections that need extra support.
- Set the style: Apply a light-hold hairspray to set the hairstyle in place and keep it secure throughout the day or night.
- Add finishing touches: If desired, add a decorative hair accessory such as small flowers, a floral hairpin, or a nature-inspired hair comb to enhance the romantic and whimsical feel of the look.
Now you have a romantic and whimsical garden party updo that’s perfect for outdoor events, weddings, or other special occasions held in a garden or natural setting!
31. Flower Power Updo
A “Flower Power Updo” is a fun and whimsical hairstyle that incorporates flowers and braids for a fresh, nature-inspired look. This hairstyle is perfect for spring and summer events, outdoor weddings, or when you want to add a touch of botanical beauty to your outfit. Here’s a step-by-step guide to create a flower power updo:

- Prepare your hair: Start with clean, dry, and tangle-free hair. Apply a heat protectant spray to protect your hair from heat damage if you plan to curl your hair.
- Add texture: If your hair is naturally wavy or curly, work with your natural texture. If your hair is straight, use a curling iron or wand to create loose, textured waves throughout your hair. Allow the curls to cool down before moving on to the next step.
- Create a side or center part: Depending on your preference, create a side or center part using a comb.
- Section your hair: Divide your hair into three sections – left, right, and back.
- Braid the side sections: Starting with the left section, create a loose Dutch or French braid, beginning at your hairline and working your way down towards the nape of your neck. Secure the end of the braid with a small hair tie. Repeat the same process with the right section.
- Create a low ponytail: Gather the back section of your hair and the two braids into a low ponytail at the nape of your neck. Remove the small hair ties from the braids and secure the entire ponytail with a hair tie.
- Create a loose bun: Hold the base of the ponytail with one hand and use the other hand to twist the ponytail around itself to create a loose bun. Ensure the bun is centered at the nape of your neck.
- Secure the bun: Tuck the end of the ponytail under the bun and secure it with bobby pins. Make sure to pin any loose strands or sections that need extra support.
- Frame your face: Leave a few face-framing pieces out and use a curling iron or wand to create gentle waves or curls for a softer, more romantic look.
- Add flowers: Tuck small flowers or flower pins throughout the braids and the bun, making sure they are evenly distributed and secure. Choose flowers that complement your outfit or the event theme. You can use fresh flowers or high-quality faux flowers, depending on your preference.
- Adjust and secure: Check the overall balance of the flower power updo and use additional bobby pins to secure any loose hair or sections that need extra support.
- Set the style: Apply a light-hold hairspray to set the hairstyle in place and keep it secure throughout the day or night.
Now you have a fun and whimsical flower power updo that’s perfect for spring and summer events, outdoor weddings, or when you want to add a touch of botanical beauty to your outfit!
32. Messy Waterfall of Curls
A “Messy Waterfall of Curls” hairstyle is a romantic and effortless look that features cascading curls and a waterfall braid. This hairstyle is perfect for special occasions, outdoor events, or when you want a soft, dreamy appearance. Here’s a step-by-step guide to create a messy waterfall of curls:

- Prepare your hair: Start with clean, dry, and tangle-free hair. Apply a heat protectant spray to protect your hair from heat damage.
- Curl your hair: Use a curling iron or wand to create loose, textured curls throughout your hair. Make sure to curl your hair in different directions to create a more natural look. Allow the curls to cool down before moving on to the next step.
- Create a side or center part: Depending on your preference, create a side or center part using a comb.
- Section your hair: Divide your hair into two sections – left and right. Clip one section away for now.
- Create a waterfall braid: Starting with the unclipped section, pick up a small section of hair near your hairline and divide it into three equal parts. Begin a regular three-strand braid by crossing the right strand over the middle and then the left strand over the new middle strand.
- Continue the braid: When you cross the right strand over the middle again, pick up a new section of hair and add it to the strand before crossing it over. When you cross the left strand over the middle, drop it and let it hang loose, creating the waterfall effect. Pick up a new section of hair directly behind the dropped strand and cross it over the middle strand.
- Repeat the process: Continue the waterfall braid by adding new sections of hair to the right strand and dropping sections of hair from the left strand. Work your way down and across your head, following the curve of your head, until you reach the other side.
- Secure the braid: When you reach the other side, continue braiding the remaining hair without adding or dropping any more sections. Secure the end of the braid with a small hair tie.
- Create volume: Gently pull on the edges of the waterfall braid to create a looser, more voluminous look.
- Frame your face: Leave a few face-framing pieces out and use a curling iron or wand to create gentle waves or curls for a softer, more romantic appearance.
- Set the style: Apply a light-hold hairspray to set the hairstyle in place and keep it secure throughout the day or night.
Now you have a romantic and effortless messy waterfall of curls that’s perfect for special occasions, outdoor events, or when you want a soft, dreamy appearance!
33. Pinned Up Curls
A “Pinned Up Curls” hairstyle is a versatile and elegant look that features voluminous curls pinned up in a stylish arrangement. This hairstyle is perfect for special occasions, weddings, or when you want a classic, glamorous appearance. Here’s a step-by-step guide to create pinned up curls:

- Prepare your hair: Start with clean, dry, and tangle-free hair. Apply a heat protectant spray to protect your hair from heat damage.
- Curl your hair: Use a curling iron or wand to create voluminous curls throughout your hair. Choose the curl size based on your preference and the desired level of glamour. Allow the curls to cool down before moving on to the next step.
- Create a side or center part: Depending on your preference, create a side or center part using a comb.
- Add volume: Gently tease the hair at the crown of your head to create some volume. Be careful not to damage your hair or disturb the curls.
- Divide your hair: Section your hair into three parts – left, right, and back.
- Pin up the back section: Working with the back section first, take one curl at a time and loosely pin it up towards the crown of your head. The placement of the curls can be random or more structured, depending on your desired look. Continue this process until all curls in the back section are pinned up.
- Pin up the side sections: Move on to the side sections, and pin up the curls in a similar manner, working your way from the bottom up. Make sure the pinned-up curls blend seamlessly with the back section.
- Frame your face: If desired, leave a few face-framing curls loose for a softer, more romantic look. Use a curling iron or wand to touch up any curls that need extra definition.
- Adjust and secure: Check the overall balance of the pinned-up curls hairstyle, and use additional bobby pins to secure any loose curls or sections that need extra support.
- Set the style: Apply a strong-hold hairspray to set the hairstyle in place and keep it secure throughout the day or night.
- Add finishing touches (optional): If desired, add a decorative hair accessory such as a jeweled hairpin, comb, or small flowers to enhance the elegance and glamour of the look.
Now you have a versatile and elegant pinned-up curls hairstyle that’s perfect for special occasions, weddings, or when you want a classic, glamorous appearance!
34. Romantic Updo
A “Romantic Updo” is a soft, elegant hairstyle that features loose curls, braids, or twists, perfect for special occasions, weddings, or when you want a dreamy, feminine appearance. Here’s a step-by-step guide to create a romantic updo:

- Prepare your hair: Start with clean, dry, and tangle-free hair. Apply a heat protectant spray to protect your hair from heat damage.
- Curl your hair: Use a curling iron or wand to create loose, textured curls throughout your hair. Allow the curls to cool down before moving on to the next step.
- Create a side or center part: Depending on your preference, create a side or center part using a comb.
- Add volume: Gently tease the hair at the crown of your head to create some volume. Be careful not to damage your hair or disturb the curls.
- Section your hair: Divide your hair into three sections – left, right, and back.
- Braid or twist the side sections: Starting with the left section, create a loose Dutch, French, or rope braid, beginning at your hairline and working your way down towards the nape of your neck. Secure the end of the braid with a small hair tie. Repeat the same process with the right section. If you prefer, you can create twists instead of braids.
- Create a low ponytail: Gather the back section of your hair and the two braids or twists into a low ponytail at the nape of your neck. Remove the small hair ties from the braids or twists and secure the entire ponytail with a hair tie.
- Create a loose bun: Hold the base of the ponytail with one hand and use the other hand to twist the ponytail around itself to create a loose bun. Ensure the bun is centered at the nape of your neck.
- Secure the bun: Tuck the end of the ponytail under the bun and secure it with bobby pins. Make sure to pin any loose strands or sections that need extra support.
- Frame your face: Leave a few face-framing pieces out and use a curling iron or wand to create gentle waves or curls for a softer, more romantic look.
- Adjust and secure: Check the overall balance of the romantic updo and use additional bobby pins to secure any loose hair or sections that need extra support.
- Set the style: Apply a light-hold hairspray to set the hairstyle in place and keep it secure throughout the day or night.
- Add finishing touches (optional): If desired, add a decorative hair accessory such as a jeweled hairpin, comb, or small flowers to enhance the romantic and feminine feel of the look.
Now you have a soft, elegant romantic updo that’s perfect for special occasions, weddings, or when you want a dreamy, feminine appearance!
35. Mohawk Inspiration
A “Mohawk Inspiration” hairstyle is a bold and edgy look inspired by the traditional Mohawk, but with a modern and more wearable twist. This hairstyle can be achieved using braids, twists, or even curls, depending on your preference. Here’s a step-by-step guide to create a Mohawk Inspiration hairstyle using a Dutch braid:

- Prepare your hair: Start with clean, dry, and tangle-free hair. Apply a texturizing spray or mousse to give your hair extra grip and hold.
- Section your hair: Create a section in the center of your head, extending from your forehead to the nape of your neck, resembling a Mohawk. The width of the section should be about 2-3 inches, depending on the size of your head and your preference. Clip the side sections away for now.
- Create a Dutch braid: Begin at your hairline and create a Dutch braid by dividing the center section into three equal parts. Cross the right strand under the middle strand, then the left strand under the new middle strand. Continue braiding by adding more hair to each strand as you go, making sure to maintain the Mohawk shape by only picking up hair from the center section.
- Secure the braid: Continue braiding until you reach the nape of your neck. Then, finish the braid as a regular three-strand braid without adding any more hair. Secure the end of the braid with a small hair tie.
- Add volume: Gently pull on the edges of the braid to create a fuller, more voluminous look.
- Pin the braid: If you have long hair, tuck the tail of the braid underneath itself and secure it with bobby pins, hiding the end for a seamless appearance.
- Style the side sections: Release the side sections from the clips. You can choose to smooth them down for a sleek look, or create some texture with twists, braids, or curls. Secure the side sections with bobby pins, hair ties, or hair clips, depending on your desired look.
- Adjust and secure: Check the overall balance of the Mohawk Inspiration hairstyle and use additional bobby pins to secure any loose hair or sections that need extra support.
- Set the style: Apply a strong-hold hairspray to set the hairstyle in place and keep it secure throughout the day or night.
Now you have a bold and edgy Mohawk Inspiration hairstyle that’s perfect for making a statement, attending a special event, or simply expressing your individual style!
36. Sophisticated and Romantic Updo
A “Sophisticated and Romantic Updo” is an elegant hairstyle that combines soft curls, twists, or braids, creating a timeless and refined look that’s perfect for special occasions, weddings, or when you want a polished appearance. Here’s a step-by-step guide to create a sophisticated and romantic updo using curls and twists:

- Prepare your hair: Start with clean, dry, and tangle-free hair. Apply a heat protectant spray to protect your hair from heat damage.
- Curl your hair: Use a curling iron or wand to create loose, textured curls throughout your hair. Allow the curls to cool down before moving on to the next step.
- Create a side or center part: Depending on your preference, create a side or center part using a comb.
- Section your hair: Divide your hair into three sections – left, right, and back.
- Create twists: Starting with the left section, take a small piece of hair near your hairline and begin twisting it away from your face. As you twist, gradually add more hair to the twist, working your way down towards the nape of your neck. Once you reach the nape, continue twisting the hair until the end and secure it with a small hair tie. Repeat the same process with the right section.
- Create a low bun: Gather the back section of your hair and the two twists into a low ponytail at the nape of your neck. Remove the small hair ties from the twists and secure the entire ponytail with a hair tie. Hold the base of the ponytail with one hand and use the other hand to twist the ponytail around itself to create a loose bun. Tuck the end of the ponytail under the bun and secure it with bobby pins.
- Frame your face: Leave a few face-framing pieces out and use a curling iron or wand to create gentle waves or curls for a softer, more romantic look.
- Adjust and secure: Check the overall balance of the sophisticated and romantic updo, and use additional bobby pins to secure any loose hair or sections that need extra support.
- Set the style: Apply a light-hold hairspray to set the hairstyle in place and keep it secure throughout the day or night.
- Add finishing touches (optional): If desired, add a decorative hair accessory such as a jeweled hairpin, comb, or small flowers to enhance the elegance and sophistication of the look.
Now you have a timeless and refined sophisticated and romantic updo that’s perfect for special occasions, weddings, or when you want a polished appearance!
37. Messy Twists and Braids
A “Messy Twists and Braids” hairstyle is a relaxed, bohemian-inspired look that combines different braiding and twisting techniques to create an effortlessly chic appearance. This hairstyle is perfect for casual outings, festivals, or when you want a laid-back, trendy style. Here’s a step-by-step guide to create a messy twists and braids hairstyle:

- Prepare your hair: Start with clean, dry, and tangle-free hair. Apply a texturizing spray or sea salt spray to give your hair extra grip and a beachy texture.
- Create a side or center part: Depending on your preference, create a side or center part using a comb.
- Section your hair: Divide your hair into a few large sections (around 4-6) depending on the thickness of your hair and your desired look.
- Create twists and braids: Working with one section at a time, create a loose braid or twist. You can mix and match different types of braids, such as Dutch, French, or rope braids, to add variety and interest to the hairstyle. Secure the end of each braid or twist with a small hair tie.
- Add volume: Gently pull on the edges of each braid or twist to create a fuller, more voluminous look. This also adds to the messy, bohemian appearance of the hairstyle.
- Pin the twists and braids: Start at the nape of your neck, take one twist or braid, and loosely pin it up towards the crown of your head. The placement can be random or more structured, depending on your desired look. Continue this process with the other twists and braids, making sure they are pinned securely and blend seamlessly.
- Frame your face: Leave a few face-framing pieces out and use a curling iron or wand to create gentle waves or curls for a softer, more romantic look.
- Adjust and secure: Check the overall balance of the messy twists and braids hairstyle, and use additional bobby pins to secure any loose hair or sections that need extra support.
- Set the style: Apply a light-hold hairspray to set the hairstyle in place and keep it secure throughout the day or night.
- Add finishing touches (optional): If desired, add a decorative hair accessory such as a headband, hairpin, or small flowers to enhance the bohemian and laid-back feel of the look.
Now you have a relaxed, bohemian-inspired messy twists and braids hairstyle that’s perfect for casual outings, festivals, or when you want a laid-back, trendy style!
38. Curled Updo
A “Curled Updo” is an elegant and versatile hairstyle that features soft curls pinned up to create a polished and sophisticated look. This hairstyle is perfect for special occasions, weddings, or when you want a classy appearance. Here’s a step-by-step guide to create a curled updo:

- Prepare your hair: Start with clean, dry, and tangle-free hair. Apply a heat protectant spray to protect your hair from heat damage.
- Curl your hair: Use a curling iron or wand to create loose, textured curls throughout your hair. Allow the curls to cool down before moving on to the next step.
- Create a side or center part: Depending on your preference, create a side or center part using a comb.
- Add volume: Gently tease the hair at the crown of your head to create some volume. Be careful not to damage your hair or disturb the curls.
- Section your hair: Divide your hair into small sections (around 1-2 inches wide), starting at the nape of your neck and working your way up towards the crown of your head.
- Pin the curls: Take one section at a time, and loosely twist or fold the curl before pinning it up towards the crown of your head using bobby pins. The placement can be random or more structured, depending on your desired look. Make sure each curl is securely pinned.
- Continue pinning: Repeat step 6 with the remaining sections of your hair, working your way up towards the crown of your head. Ensure the curls blend seamlessly, creating a cohesive updo.
- Frame your face: Leave a few face-framing pieces out and use a curling iron or wand to create gentle waves or curls for a softer, more romantic look.
- Adjust and secure: Check the overall balance of the curled updo, and use additional bobby pins to secure any loose hair or sections that need extra support.
- Set the style: Apply a light-hold hairspray to set the hairstyle in place and keep it secure throughout the day or night.
- Add finishing touches (optional): If desired, add a decorative hair accessory such as a jeweled hairpin, comb, or small flowers to enhance the elegance and sophistication of the look.
Now you have an elegant and versatile curled updo that’s perfect for special occasions, weddings, or when you want a classy appearance!
39. Circular Twist Updo
A “Circular Twist Updo” is a chic and stylish hairstyle that features a series of twists arranged in a circular pattern, creating an elegant and unique look. This hairstyle is perfect for special occasions, weddings, or when you want a polished and sophisticated appearance. Here’s a step-by-step guide to create a circular twist updo:

- Prepare your hair: Start with clean, dry, and tangle-free hair. Apply a light hair mousse or texturizing spray to give your hair extra grip and hold.
- Create a side or center part: Depending on your preference, create a side or center part using a comb.
- Section your hair: Divide your hair into two equal sections (left and right) by creating a vertical part from the crown of your head to the nape of your neck.
- Begin twisting: Starting with the left section, take a small piece of hair near your hairline and begin twisting it away from your face. As you twist, gradually add more hair to the twist, working your way down towards the nape of your neck.
- Continue the twist around your head: Once you reach the nape of your neck, continue twisting the hair along your hairline, moving towards your right ear. Keep adding hair to the twist as you go.
- Complete the circular twist: When you reach the right ear, continue twisting the hair upwards towards the right side of your hairline, incorporating the remaining hair from the right section. Keep twisting until you reach the starting point on the left side of your hairline. You should now have a continuous circular twist around your head.
- Secure the twist: Tuck the end of the twist underneath the starting point on the left side of your hairline and secure it with bobby pins. Use additional bobby pins to secure the twist along the entire circular pattern, ensuring it’s firmly in place.
- Frame your face: Leave a few face-framing pieces out and use a curling iron or wand to create gentle waves or curls for a softer, more romantic look.
- Adjust and secure: Check the overall balance of the circular twist updo and use additional bobby pins to secure any loose hair or sections that need extra support.
- Set the style: Apply a light-hold hairspray to set the hairstyle in place and keep it secure throughout the day or night.
- Add finishing touches (optional): If desired, add a decorative hair accessory such as a jeweled hairpin, comb, or small flowers to enhance the elegance and sophistication of the look.
Now you have a chic and stylish circular twist updo that’s perfect for special occasions, weddings, or when you want a polished and sophisticated appearance!
40. Ponytail Gone Right
A “Ponytail Gone Right” is an elevated version of the classic ponytail, adding a touch of sophistication and style to the everyday look. This hairstyle is perfect for both casual and more formal occasions. Here’s a step-by-step guide to create a “Ponytail Gone Right” hairstyle:

- Prepare your hair: Start with clean, dry, and tangle-free hair. Apply a light hair mousse or texturizing spray to give your hair extra grip and hold.
- Create volume: Gently tease the hair at the crown of your head to create some volume. Be careful not to damage your hair.
- Smooth the hair: Using a soft-bristle brush, gently smooth your hair back towards the point where you want your ponytail to sit. For a more formal look, position the ponytail higher on your head; for a casual look, position it lower. Be careful not to disturb the volume you created in step 2.
- Secure the ponytail: Gather your hair into a ponytail, making sure it is smooth and free of bumps. Use a hair tie that matches your hair color to secure the ponytail in place.
- Hide the hair tie: Take a small section of hair from the underside of your ponytail and wrap it around the base of the ponytail to cover the hair tie. Secure the end of the wrapped section with a bobby pin, tucking it discreetly under the ponytail.
- Add texture: If you want a more tousled look, use a texturizing spray or dry shampoo on the length of your ponytail and scrunch it with your hands to create a slightly messy texture.
- Curl the ponytail (optional): For added sophistication, use a curling iron or wand to create loose, soft waves in your ponytail.
- Frame your face: Leave a few face-framing pieces out and use a curling iron or wand to create gentle waves or curls for a softer, more romantic look.
- Adjust and secure: Check the overall balance of the “Ponytail Gone Right” hairstyle and use additional bobby pins to secure any loose hair or sections that need extra support.
- Set the style: Apply a light-hold hairspray to set the hairstyle in place and keep it secure throughout the day or night.
Now you have an elevated and stylish “Ponytail Gone Right” hairstyle that’s perfect for both casual and more formal occasions!
Conclusion
In conclusion, updos for long hair offer a versatile and stylish array of options for any occasion. From elegant chignons and sophisticated twists to playful braids and casual messy buns, there is an updo to suit every personality, event, and fashion preference. Experimenting with different techniques and incorporating accessories can elevate your updo game, adding a touch of flair and creativity to your look.
By mastering a few key hairstyles, you’ll be well-equipped to transform your long locks into stunning updos that showcase your personal style and enhance your overall appearance. So go ahead, embrace the endless possibilities that updos for long hair provide, and step out with confidence and grace.